Installing Linux On Virtual Machine: A Guide
Whether you’re a curious beginner or a seasoned tech enthusiast, this comprehensive guide will equip you with the knowledge and steps to install Linux on your virtual machine. We’ll cover popular choices like VirtualBox and VMware, walk you through the configuration process, and provide tips for optimizing your setup. So, buckle up, get ready to experiment, and unleash the power of Linux within your own virtual playground!
You may have already read guides on installing essential software like Firefox on Linux or unlocking the potential of your Chromebook by installing “Linux.” But have you ever considered creating your own personalized Linux environment from scratch? By installing Linux on a virtual machine (VM), you can explore this exciting operating system without altering your current setup. This opens doors to a world of customization, powerful tools, and a unique digital experience.
How To Install Linux On Virtual Machines?
Here’s a general overview of the process, covering popular choices like VirtualBox and VMware:
Preparation:
- Choose a virtualization software: Popular options include VirtualBox (free and open-source) and VMware Workstation Player (free for non-commercial use). Download and install your preferred software;
- Select a Linux distribution: Consider factors like user-friendliness, specific features, and your experience level. Ubuntu, Mint, and Fedora are beginner-friendly, while Debian and Arch provide more customization. Download the desired distribution’s ISO (installation image) file from the official website;
- Allocate resources: Decide how much RAM and storage space you want to allocate to the VM based on your system’s capacity and the Linux distribution’s recommended requirements.
Creating the Virtual Machine:
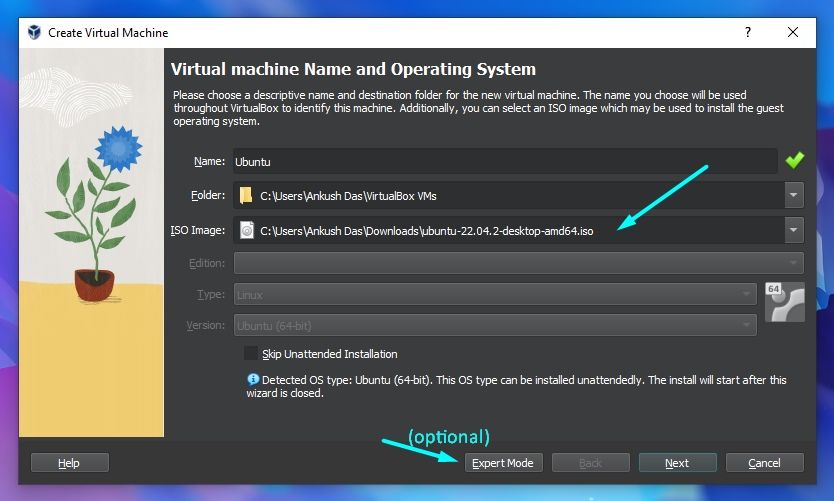
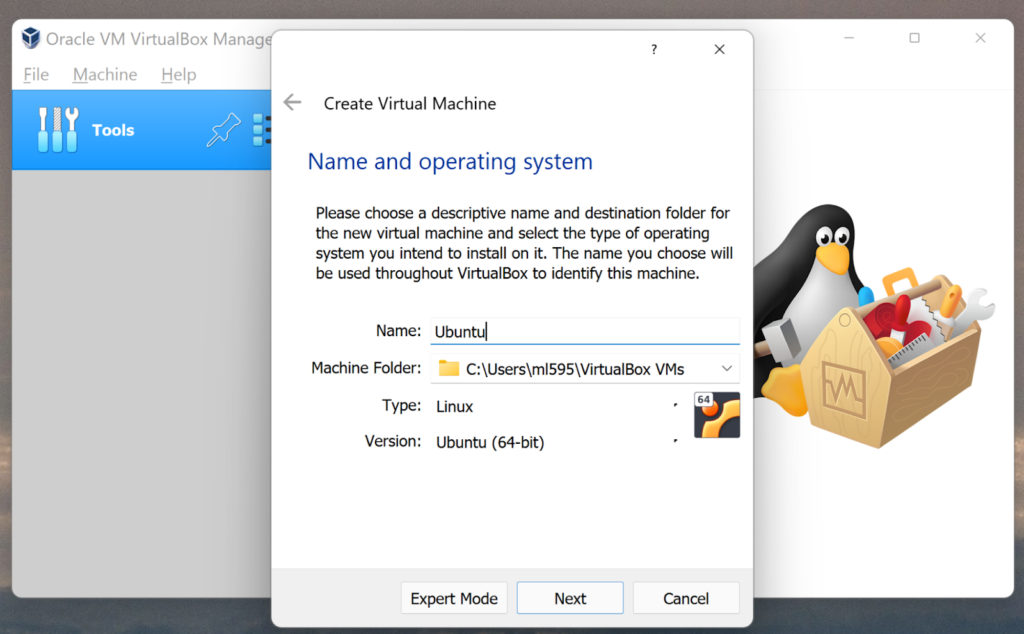
- Open your virtualization software and create a new VM. Provide a name, select “Linux” as the type, and choose the appropriate version based on the downloaded ISO file;
- Configure memory (RAM): Allocate a suitable amount based on your system’s resources and expected usage. More RAM allows for smoother performance, but don’t overcommit and leave insufficient RAM for your host system;
- Create a virtual hard disk (VHD): Choose a fixed or dynamically allocated disk. A fixed disk offers better performance but has a set size, while a dynamic disk expands as needed but might have slightly lower performance. Allocate enough space for the Linux distribution and potential future data;
- Optional settings: You can customize network adapter settings, display options, shared folders, and more based on your preferences and requirements.
Installing Linux:
- Start the VM. In the VM settings, under “Storage,” select the downloaded ISO file as the bootable CD/DVD drive;
- Follow the on-screen installation instructions for the chosen Linux distribution. The process usually involves partitioning the virtual hard disk, creating user accounts, configuring networking, and selecting software packages to install;
- Finalize the installation and reboot the VM.
Optimizing the Experience (Optional):
- Install VirtualBox Guest Additions (VirtualBox only): This enhances performance and functionality by providing better video resolution, shared folders, and more;
- Update and upgrade your Linux distribution: Ensure you have the latest security patches and features by running the appropriate commands or using the distribution’s package manager;
- Customize your desktop environment: Explore themes, icons, and applications to personalize your Linux experience.
Below is a sample code to guide you through installing Linux on a virtual machine using VirtualBox:
bash
#!/bin/bash # Install VirtualBox (assuming Ubuntu/Debian-based system) sudo apt update sudo apt install virtualbox # Download Linux ISO (Example: Ubuntu 20.04) wget https://releases.ubuntu.com/20.04/ubuntu-20.04.3-desktop-amd64.iso # Install VirtualBox Extension Pack wget https://download.virtualbox.org/virtualbox/6.1.30/Oracle_VM_VirtualBox_Extension_Pack-6.1.30.vbox-extpack sudo VBoxManage extpack install Oracle_VM_VirtualBox_Extension_Pack-6.1.30.vbox-extpack # Create Virtual Machine VBoxManage createvm –name “LinuxVM” –ostype “Ubuntu_64” –register # Configure Virtual Machine VBoxManage modifyvm “LinuxVM” –memory 2048 –vram 128 –cpus 2 VBoxManage modifyvm “LinuxVM” –nic1 nat VBoxManage modifyvm “LinuxVM” –boot1 dvd –boot2 disk –boot3 none –boot4 none # Attach ISO to Virtual Machine VBoxManage storagectl “LinuxVM” –name “IDE Controller” –add ide VBoxManage storageattach “LinuxVM” –storagectl “IDE Controller” –port 0 –device 0 –type dvddrive –medium ubuntu-20.04.3-desktop-amd64.iso # Start Virtual Machine VBoxManage startvm “LinuxVM”
This script performs the following steps:
- Installs VirtualBox;
- Downloads the Linux ISO (in this case, Ubuntu 20.04);
- Installs VirtualBox Extension Pack for additional features;
- Creates a Virtual Machine named “LinuxVM”;
- Configures the Virtual Machine settings (memory, CPU, network);
- Attaches the downloaded Linux ISO to the Virtual Machine;
- Starts the Virtual Machine.
Make sure to adjust the script according to your specific requirements, such as the desired Linux distribution, memory allocation, and CPU settings. Additionally, ensure you have necessary permissions to execute the script and that you’re running it on a compatible system.
How To Install A Virtual Machine? Tips and tricks
Below are some tips and tricks to enhance your experience when installing Linux on a virtual machine:
- 1. Choose the Right Linux Distribution. Select a Linux distribution that fits your needs and preferences. Popular choices include Ubuntu, Fedora, Debian, and CentOS;
- Allocate Sufficient Resources. Allocate an appropriate amount of RAM, CPU cores, and disk space to the virtual machine to ensure smooth performance. Consider the requirements of the Linux distribution and the applications you plan to run;
- Enable Virtualization Technology. Ensure that virtualization technology (such as Intel VT-x or AMD-V) is enabled in your computer’s BIOS/UEFI settings. This improves the performance of virtual machines;
- Install Guest Additions or Tools. Install guest additions or tools provided by the virtualization software (e.g., VirtualBox Guest Additions or VMware Tools). These utilities enhance integration, provide better display resolution, enable shared folders, and improve mouse integration;
- Take Snapshots. Before making significant changes to the virtual machine (e.g., software installations or configurations), take snapshots. Snapshots allow you to revert to a previous state if something goes wrong;
- Use Linked Clones. Utilize linked clones if your virtualization software supports them. Linked clones save disk space by sharing the same virtual disk with the parent VM and only storing the differences;
- Customize Display Settings. Adjust display settings within the virtual machine to match your screen resolution. This ensures a comfortable viewing experience and prevents blurry or stretched graphics;
- Enable Shared Clipboard and Drag-and-Drop. Enable shared clipboard and drag-and-drop functionality between the host and guest operating systems. This facilitates seamless file transfers and copying/pasting text between environments;
- Configure Networking. Set up networking properly to ensure the virtual machine can access the internet and communicate with other devices on the network. Choose between NAT, Bridged, or Host-only networking modes based on your requirements;
- Explore Virtual Machine Management Features. Familiarize yourself with the management features of your virtualization software, such as snapshots, cloning, and remote access. These features can streamline workflow and improve productivity.
By following these tips and tricks, you can optimize your Linux virtual machine installation for better performance, usability, and efficiency.
How To Install Linux On Virtual Machine? Troubleshooting
Venturing into the realm of virtualization by installing Linux on a virtual machine (VM) can be a transformative experience for both beginners and seasoned users alike. However, like any technical endeavor, it may encounter challenges along the way. In this troubleshooting guide, we’ll address common issues that may arise during the installation process of Linux on a virtual machine. From resolving compatibility issues to troubleshooting installation failures, we’ve got you covered. Let’s delve into troubleshooting and ensure a smooth installation of Linux on your virtual machine.
- Compatibility Check. Before proceeding with the installation, ensure that your host system meets the hardware and software requirements for running a virtual machine. Verify that your CPU supports virtualization technology (e.g., Intel VT-x or AMD-V) and that virtualization is enabled in your system’s BIOS settings. Additionally, ensure that you have sufficient RAM and disk space to allocate to the virtual machine;
- Virtualization Software Configuration. If you encounter issues with virtualization software such as VMware, VirtualBox, or KVM, ensure that the software is properly configured. Verify that the virtualization software is up to date and compatible with your host operating system. Check the software’s settings to ensure that virtualization extensions are enabled and that the necessary resources (CPU cores, RAM, disk space) are allocated to the virtual machine;
- Installation Media Integrity. If you encounter errors or failures during the installation process, verify the integrity of the Linux installation media (e.g., ISO file). Corrupted or incomplete installation media can cause installation issues. Check the checksum of the ISO file against the official checksum provided by the Linux distribution’s website to ensure that the file has not been tampered with or corrupted during download.
- Virtual Machine Configuration. Ensure that the virtual machine configuration is set up correctly before starting the installation process. Specify the desired amount of RAM, CPU cores, disk space, and other settings according to your requirements. Pay attention to details such as the virtual machine’s network configuration, storage controller type, and graphics settings to ensure optimal performance and compatibility.
- Installation Options. If the installation process encounters errors or fails to proceed, try different installation options or settings. For example, you may encounter issues related to disk partitioning, bootloader installation, or driver compatibility. Experiment with different installation methods, partitioning schemes, and bootloader options to find a configuration that works for your virtual machine setup.
By troubleshooting common issues such as compatibility check failures, virtualization software configuration problems, installation media integrity issues, virtual machine configuration errors, and installation options discrepancies, you can overcome hurdles and successfully install Linux on a virtual machine.
If you encounter any other issues not covered in this guide, don’t hesitate to seek assistance from online forums, user communities, or the virtualization software’s support resources. With persistence and patience, you’ll be running Linux on your virtual machine in no time. Happy virtualizing!