
SSL Certificate Installation on Linux: A Guide
In today’s digital age, website security is paramount. One crucial component of web security is the use of SSL (Secure Sockets Layer) certificates to encrypt data transmitted between web servers and clients. Linux is a popular choice for web hosting due to its robustness and flexibility. In this guide, we’ll walk you through the process of installing an SSL certificate on a Linux server to ensure secure connections and instill trust in your website visitors.
Preparing Your Linux Server: How to Install SSL Certificate on Linux?
Before we dive into SSL certificate installation, it’s essential to ensure that your Linux server is adequately prepared. Make sure your server meets the necessary requirements and is up to date with the latest security patches. Additionally, you’ll need root or sudo access to carry out the following steps effectively.
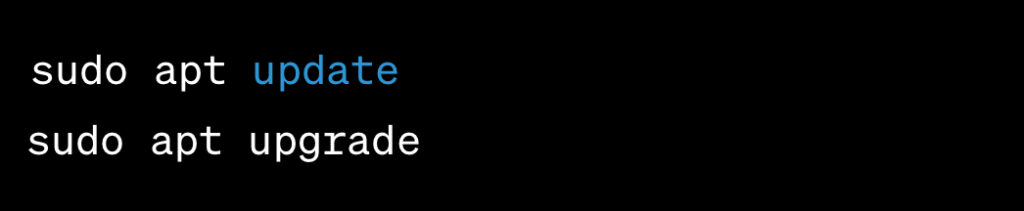
To check for updates and apply them, use the following commands:
Ensuring that your server is up to date is crucial for maintaining its security and compatibility with SSL certificates.
Obtaining an SSL Certificate
SSL certificates come in various types, including self-signed certificates, free certificates, and paid certificates from trusted Certificate Authorities (CAs). Your choice depends on your specific needs. Self-signed certificates are suitable for testing or internal use but may not be trusted by browsers. Free certificates, such as those from Let’s Encrypt, are valid and trusted by most browsers. Paid certificates offer higher levels of validation and customer support. Choose the one that fits your requirements and budget.
Let’s Encrypt is a popular choice for obtaining free SSL certificates. To install Let’s Encrypt on your Linux server, follow these steps:
1. Install Certbot, Let’s Encrypt’s official client:

2. Request a certificate for your domain:
 ```
   sudo certbot certonly --standalone -d yourdomain.com
   ```
3. Certbot will guide you through the process of obtaining and installing the certificate. Follow the prompts to complete the installation.
Generating a CSR (Certificate Signing Request)
To obtain an SSL certificate, you’ll need to generate a Certificate Signing Request (CSR). A CSR contains essential information about your server and domain. We’ll guide you through the process of creating a CSR on your Linux server, which is a crucial step in the certificate issuance process.
To generate a CSR, use the `openssl` command as follows:
```
openssl req -new -newkey rsa:2048 -nodes -keyout yourdomain.key -out yourdomain.csr
```
Replace `yourdomain` with your actual domain name. This command will generate a private key (`yourdomain.key`) and a CSR (`yourdomain.csr`). Keep the private key secure as it’s an integral part of the SSL certificate installation.
How to Install SSL Certificate on Linux? Purchasing or Obtaining a Certificate
Once you have your CSR ready, you can proceed to purchase a certificate from a trusted CA or obtain a free one, such as Let’s Encrypt. Keep your private key secure, as it’s an integral part of the SSL certificate installation.
If you choose to purchase a certificate, you can do so from reputable CAs like DigiCert, GlobalSign, or Comodo. They offer various certificate types, including Domain Validated (DV), Organization Validated (OV), and Extended Validation (EV) certificates, each with different levels of validation and features.
For those who prefer a free option, Let’s Encrypt provides DV certificates that are widely recognized by browsers. As mentioned earlier, Certbot simplifies the process of obtaining and installing Let’s Encrypt certificates on your Linux server.
Installing the SSL Certificate
With your SSL certificate in hand, it’s time to install it on your Linux server. We’ll provide you with detailed steps, including commands and configuration file edits, to ensure a seamless installation process.
Here are the general steps to install an SSL certificate on an Apache web server:
- Copy your SSL certificate and private key to the appropriate directories on your server.
```
sudo cp /path/to/yourdomain.crt /etc/ssl/certs/
sudo cp /path/to/yourdomain.key /etc/ssl/private/
```- Create a configuration file for your SSL-enabled site.
```
sudo nano /etc/apache2/sites-available/yourdomain-ssl.conf
```- In the configuration file, add the following lines to set up SSL:
```
<VirtualHost *:443>
    ServerName yourdomain.com
    DocumentRoot /var/www/html

    SSLEngine on
    SSLCertificateFile /etc/ssl/certs/yourdomain.crt
    SSLCertificateKeyFile /etc/ssl/private/yourdomain.key
</VirtualHost>
```- Save the configuration file and enable the SSL site:

- Reload Apache to apply the changes:

Your SSL certificate is now installed and configured for your website.
Configuring Your Web Server: How to Install SSL Certificate on Linux?
To make use of your SSL certificate, you’ll need to configure your web server (e.g., Apache or Nginx) properly. We’ll walk you through the necessary configuration changes, including sample configuration snippets, to enable secure connections.
Here are the steps to configure SSL for an Nginx web server:
- Create a configuration file for your SSL-enabled site:
```
sudo nano /etc/nginx/sites-available/yourdomain-ssl
```- In the configuration file, add the following lines to set up SSL:
```
server {
    listen 443 ssl;
    server_name yourdomain.com;
    root /var/www/html;

    ssl_certificate /etc/ssl/certs/yourdomain.crt;
    ssl_certificate_key /etc/ssl/private/yourdomain.key;

Additional SSL settings (e.g., preferred protocols, ciphers) can be added here.
}
```- Save the configuration file and create a symbolic link to enable the SSL site:
```
sudo ln -s /etc/nginx/sites-available/yourdomain-ssl /etc/nginx/sites-enabled/
```- Test the Nginx configuration:

- If the configuration test is successful, reload Nginx to apply the changes:

Your Nginx web server is now configured to use SSL.
How to Test Your SSL Installation?
After installation and configuration, it’s essential to verify that your SSL certificate is functioning correctly. We’ll outline methods and tools to test your SSL setup and ensure everything is in order.
One simple way to test your SSL installation is to visit your website using the HTTPS protocol (e.g., https://yourdomain.com) in a web browser. If the browser displays a padlock icon or a “Secure” indicator, it indicates that the SSL certificate is working correctly.
Additionally, you can use online SSL checker tools or command-line utilities like OpenSSL to perform more in-depth checks and diagnostics.
How to Renew and Manage SSL Certificates?
SSL certificates have a limited validity period, typically one year. Learn about the importance of certificate renewal and how to automate the process using tools or scripts to ensure uninterrupted security.
To renew Let’s Encrypt certificates obtained with Certbot, you can set up automatic renewal using a cron job. Certbot will automatically check for expiring certificates and renew them if necessary. Here’s how to set it up:
1. Open your crontab configuration for editing:

2. Add the following line to run Certbot’s renewal check twice a day:

3. Save and exit the editor. Certbot will now handle certificate renewals automatically.
Securing your website with an SSL certificate on a Linux server is a critical step in protecting your users’ data and building trust. By following this comprehensive guide, you’ve acquired the knowledge and skills to install and manage SSL certificates effectively. Embrace the power of encryption and keep your online presence safe.