Master Apache Installation on Linux: Step-by-Step Guide
You may have already read guides on installing essential software like Firefox on Linux or unlocking the potential of your Chromebook by installing Linux. Now, it’s time to delve deeper into the realm of system administration with another fundamental task: installing Apache on Linux. Whether you’re a seasoned Linux user or just beginning your journey, understanding how to set up and configure Apache—the world’s most widely used web server—on your Linux system is a crucial skill.
In this tutorial, we’ll walk you through the step-by-step process of installing Apache on Linux, accompanied by expert tips, troubleshooting techniques, and best practices.
How to install the Apache in Linux?
Embark on the journey to set up Apache on your Linux system with confidence. Dive into this comprehensive guide, meticulously crafted to ensure a smooth installation and configuration process.
1. What prerequisites do I need to install Apache on Linux?
Prepare your Linux environment by ensuring it’s up-to-date and equipped with necessary packages. Kickstart the process with these essential commands:
bash
sudo apt update sudo apt upgrade
2. How do I install Apache on Linux?
Embark on your Apache journey by harnessing the power of package management. Execute the following command to initiate the installation process:
bash
sudo apt install apache2
3. How can I start the Apache service on Linux?
With Apache now snugly nestled in your system, it’s time to breathe life into it. Launch the Apache service with this command:
bash
sudo systemctl start apache2
4. How do I enable Apache to start on boot?
Ensure Apache seamlessly integrates into your system’s startup routine. Empower Apache to initiate automatically on boot by enabling the service:
bash
sudo systemctl enable apache2
5. How can I verify if Apache is running on Linux?
Don your detective hat and investigate Apache’s status with utmost precision using this command:
bash
sudo systemctl status apache2
6. How do I configure Apache on Linux?
Unlock the gates to Apache’s configuration realm by delving into its main configuration file located at /etc/apache2/apache2.conf. Navigate this file with the finesse of a seasoned explorer using your preferred text editor, such as Nano:
bash
sudo nano /etc/apache2/apache2.conf
7. How do I set up virtual hosts on Apache?
Embrace the power of virtualization by crafting virtual host configuration files within the /etc/apache2/sites-available/ directory. Forge ahead and create your virtual host file using this command as your guiding light:
bash
sudo nano /etc/apache2/sites-available/example.com.conf
8. How do I enable a virtual host on Apache?
Empower your virtual host to spread its wings and soar high in the digital skies by activating it with the venerable a2ensite command:
bash
sudo a2ensite example.com.conf
9. How do I disable a virtual host on Apache?
Should the need arise to reign in your virtual host’s exuberance, exercise control with the a2dissite command:
bash
sudo a2dissite example.com.conf
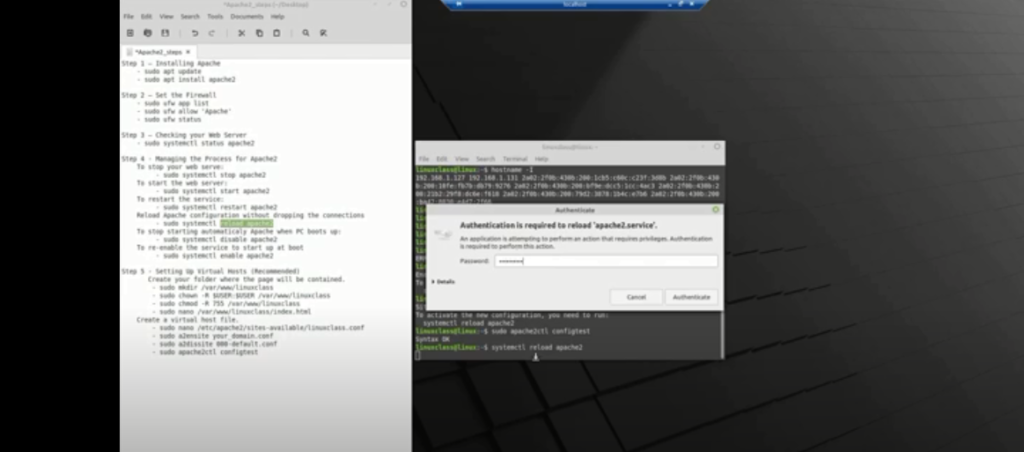
10. How can I test the Apache configuration for syntax errors?
Before declaring victory, put Apache’s configuration through rigorous scrutiny to weed out any syntax anomalies. Execute this command to conduct a thorough examination:
bash
sudo apachectl configtest
Congratulations! With Apache now securely nestled within your Linux environment, you’re poised to embark on a digital odyssey, leveraging its prowess to host and serve your web projects with unparalleled finesse.
How To Install Apache On Linux? Tips and tricks
Ready to enhance your Apache installation experience on Linux? Explore these expert tips and tricks to streamline the process and optimize performance.
- 1. Choose the Right Distribution. Ensure compatibility and ease of installation by selecting a Linux distribution with robust package management support, such as Ubuntu, Debian, or CentOS.
- Pre-Installation Cleanup. Before diving into the installation process, perform a thorough system update and package cleanup to eliminate potential conflicts and ensure a smooth installation journey:
bash
sudo apt update && sudo apt upgrade
- Secure Your Installation. Enhance security by adjusting firewall settings to allow HTTP and HTTPS traffic:
bash
sudo ufw allow ‘Apache’
- Customize Configuration. Tailor Apache’s configuration to your specific requirements by editing the apache2.conf file. Utilize comments and whitespace for readability and organization:
bash
sudo nano /etc/apache2/apache2.conf
- Enable Modules Wisely. Selectively enable Apache modules based on your needs to conserve system resources and optimize performance:
bash
sudo a2enmod <module_name>
- Virtual Hosts for Versatility. Leverage virtual hosts to host multiple websites or applications on a single Apache instance, enhancing flexibility and resource utilization:
bash
sudo nano /etc/apache2/sites-available/example.com.conf sudo a2ensite example.com.conf
- Monitor Performance. Stay informed about Apache’s performance and resource utilization using tools like htop or Apache’s built-in status module:
bash
sudo apt install htop
- Automatic Updates. Keep Apache up-to-date effortlessly by enabling automatic updates for your Linux distribution, ensuring you benefit from the latest features and security patches:
bash
sudo apt install unattended-upgrades
- Backup Your Configuration. Protect your Apache configuration and virtual host settings by regularly backing up configuration files to prevent data loss in the event of system issues:
bash
sudo cp /etc/apache2/apache2.conf /path/to/backup/location
- Stay Informed. Stay abreast of Apache best practices, security advisories, and community insights to continuously refine your installation and maintenance practices: Official Apache Documentation: https://httpd.apache.org/docs/
With these expert tips and tricks at your disposal, installing Apache on Linux becomes not just a task but a seamless journey towards optimized performance and enhanced functionality.
How To Install Apache On Linux? Troubleshooting
Encountering issues during Apache installation on Linux? Don’t fret! Explore these troubleshooting techniques to overcome common hurdles and ensure a successful setup.
- 1. Verify Package Integrity. If you encounter errors during installation, ensure the integrity of Apache packages by updating package lists and checking for any broken dependencies:
bash
sudo apt update sudo apt install –reinstall apache2
- Check Port Availability. If Apache fails to start, verify that port 80, used by Apache for HTTP traffic, is not blocked by another service. Use the netstat command to check port status:
bash
sudo netstat -tuln | grep :80
- Inspect Log Files. Examine Apache’s error log files for clues on encountered issues. The main log file is located at /var/log/apache2/error.log. Tail the log in real-time for immediate feedback:
bash
sudo tail -f /var/log/apache2/error.log
- Permissions Pitfalls. Ensure Apache has proper permissions to access files and directories. Verify ownership and permissions settings for Apache’s document root directory and configuration files:
bash
sudo chown -R www-data:www-data /var/www/html sudo chmod -R 755 /var/www/html
- Address Configuration Errors. If Apache fails to start due to configuration errors, use the apachectl configtest command to identify and rectify syntax issues in your configuration files:
bash
sudo apachectl configtest
- Firewall Settings. Check firewall settings to ensure Apache traffic is allowed. If using UFW, enable Apache’s profile to permit HTTP and HTTPS traffic:
bash
sudo ufw app list sudo ufw allow ‘Apache’
- Resource Exhaustion. If Apache crashes unexpectedly, investigate system resource usage to identify potential memory or CPU exhaustion. Utilize system monitoring tools like htop to pinpoint resource-hungry processes:
bash
sudo apt install htop htop
- SELinux or AppArmor. On distributions with SELinux or AppArmor enabled, ensure Apache’s activities are permitted by the security policies. Review and adjust SELinux or AppArmor settings as necessary:
bash
sudo grep apache /var/log/audit/audit.log | audit2allow -M mypol sudo semodule -i mypol.pp
- Service Restart. If Apache behaves unexpectedly, attempt to restart the service to reset its state:
bash
sudo systemctl restart apache2
- Community Support.If all else fails, seek assistance from the vibrant Linux and Apache communities. Utilize forums, mailing lists, or IRC channels to tap into collective wisdom and troubleshoot intricate issues.
With these troubleshooting techniques in your arsenal, navigating Apache installation issues on Linux becomes a manageable endeavor, ensuring a smooth and successful setup process.