
A Step-by-Step Guide to Etcher Installation on Linux
Etcher, also known as balenaEtcher, is your go-to open-source tool for crafting bootable pen drives and SD cards from ISO images of various operating systems. This versatile tool is proudly developed by Balena and boasts a user-friendly interface, offering a seamless four-step process for creating bootable drives. Etcher stands as one of the most sought-after solutions for crafting bootable pen drives and SD cards and is compatible with Linux, macOS, and Windows operating systems.
Key features of Etcher:
- Disk Validation: Etcher goes the extra mile by validating your disk after the flashing process, ensuring data integrity and reliability;
- Sleek User Interface: With its simple yet beautiful user interface, Etcher simplifies the entire bootable drive creation process, making it accessible to users of all skill levels;
- Cross-Platform Compatibility: Etcher caters to a wide audience, offering support for multiple operating systems, including Windows, Linux, and macOS;
- Swift Performance: Say goodbye to lengthy wait times. Etcher excels in creating bootable pen drives and SD cards with impressive speed, allowing you to get your projects up and running in no time.
You may find other articles on Linux virtual machine setup for Windows 7 interesting, especially if you’re looking to install a Linux virtual machine on your Windows 7 system and need to know how to install Etcher on Linux for creating bootable USB drives.
Installing and Utilizing Etcher on Linux Platforms
Discover the process of downloading, installing, and utilizing the Etcher software on Linux.
Step 1: Acquiring Etcher for Linux
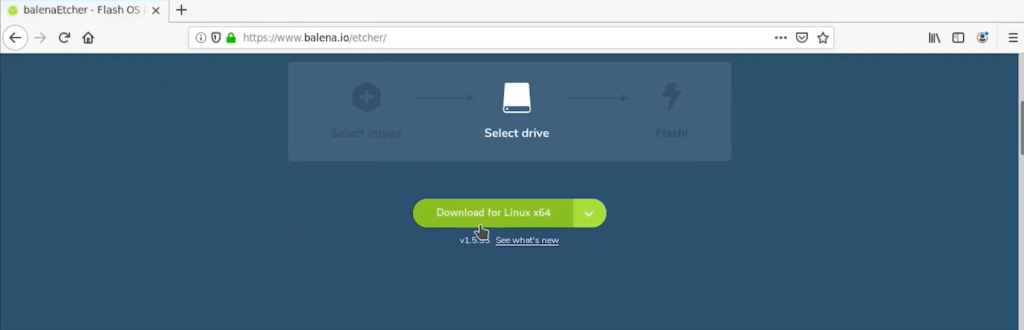
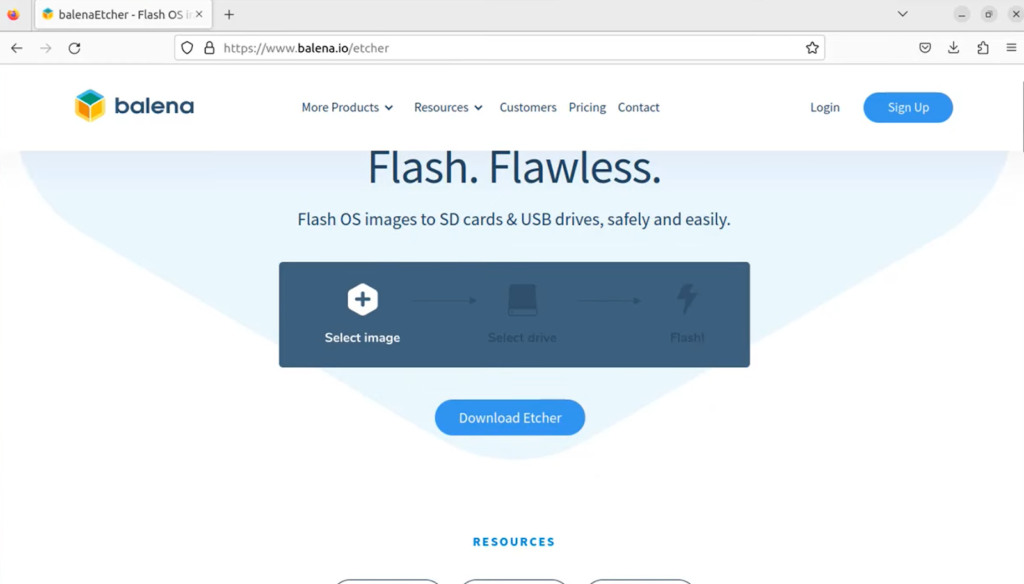
The initial step involves obtaining the Etcher software by downloading it from its official website. Navigate to the official balenaEtcher website to download the Etcher ZIP file. The site is designed to automatically recognize the Linux operating system, presenting the option to download for Linux x64.
By clicking on the “Download for Linux x64” button, you will initiate the download of the Etcher ZIP file. With this action, the Etcher software is now downloaded to your system.
Step 2: Extracting the Etcher AppImage File
Having downloaded the ZIP file, the next step is to extract the Etcher AppImage file contained within. This can be achieved through either GUI or CLI methods. Let’s first explore the GUI method for extraction. Right-click on the downloaded Etcher ZIP file and select “Extract here.” This action will unveil a folder that houses the Etcher AppImage.
To proceed with the CLI method for extracting the Etcher ZIP file, navigate to the directory where the ZIP file has been downloaded with the cd command. For the purpose of this guide, the file is located in the Downloads folder.
cd Downloads
Then, extract the ZIP file by employing the unzip command alongside the name of the Etcher ZIP file.
unzip balena-etcher-electron-1.7.9-linux-x64.zip
Following these commands, the Etcher AppImage will be available.
Step 3: Launching Etcher
The subsequent step involves launching the Etcher software. To do this, select the AppImage, right-click on it, navigate to properties, then to permissions.
Right-Click -> Properties -> Permissions
Ensure the “Allow executing file as program” option is checked.
Now, simply double-click on the AppImage to run Etcher, which will bring up the application window.
Step 4: Crafting a Bootable USB Drive with Etcher
With Etcher now installed, let’s explore its functionality for creating a bootable USB drive. Begin by selecting the ISO file, either from a local source or via a URL. In this guide, we will opt for a local file by choosing the “Flash from file” option.
Next, identify the USB drive or SD card intended for the ISO file flash by utilizing the “Select target” option.
Exercise caution in selecting the target USB drive, as this process will erase all data on the drive, rendering it temporarily unusable. After choosing the drive, click on the “Flash!” button to commence the flashing process, which will be visually confirmed by the application.
Following the completion of the flash, Etcher will proceed to validate the USB drive. This is an optional step and can be skipped if preferred.
Upon finalizing this step, the bootable USB drive is successfully created.
Setting Up Etcher on Linux Systems
Following your successful download of Etcher for Linux, the next steps will guide you through the installation process of Etcher on Linux platforms. To ensure Etcher operates smoothly on your Linux system, it’s essential to have either the zenity, Xdialog, or kdialog package installed on your preferred Linux distribution. For users of Ubuntu, Debian, Linux Mint, and other Debian-based distributions, installing zenity is straightforward due to its availability in the official package repositories of these distributions. This guide will specifically focus on Debian-based distributions, using Debian 9 Stretch as the example for demonstration purposes.
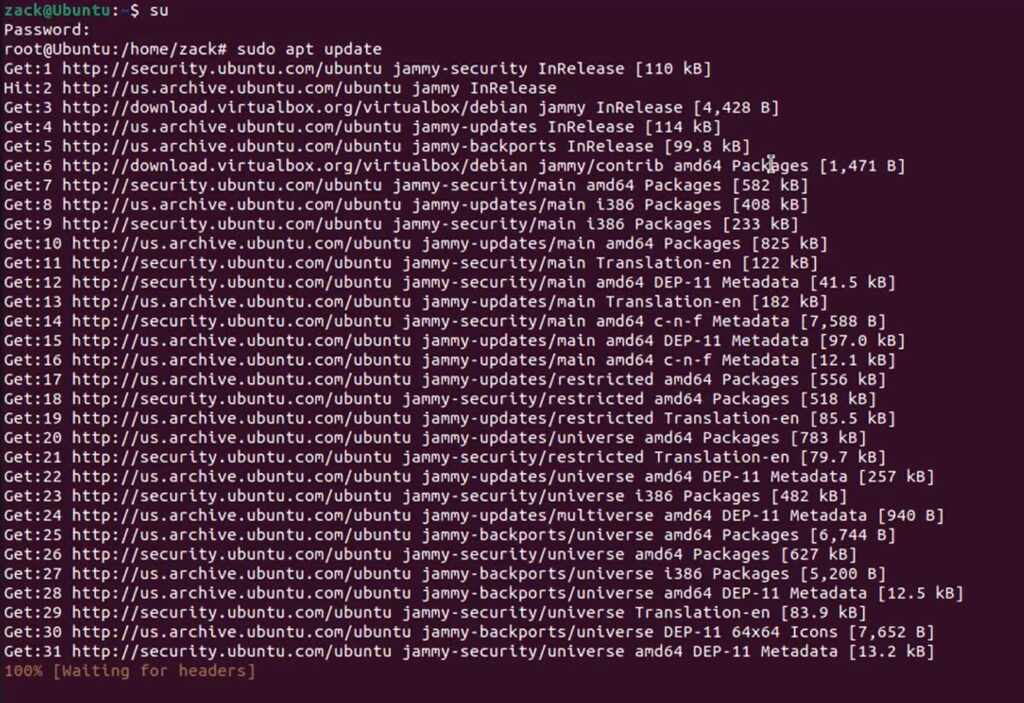
Begin by refreshing the package repository on your Ubuntu or Debian system using the following command:
sudo apt update
Next, proceed to install zenity by executing the command below:
sudo apt install zenity
When prompted, press y and then <Enter> to affirm the installation, which will result in zenity being installed on your system.
After installing the necessary package, move to the ~/Downloads directory, where you previously downloaded the Etcher zip file, with the command:
cd ~/Downloads
Within this directory, you should locate the Etcher zip archive. Proceed to unzip this file using:
unzip etcher-electron-1.4.6-linux-x64.zip
This action will extract the contents of the zip file and generate a new AppImage file, visible as indicated in the instructions.
The next step involves relocating the AppImage file to the /opt directory for better organization and accessibility, achievable with the command:
sudo mv etcher-electron-1.4.6-x86_64.AppImage /opt
To initiate Etcher, utilize the command:
/opt/etcher-electron-1.4.6-x86_64.AppImage
Upon execution, a dialog box will appear prompting you to click “Yes,” which will start the Etcher application as depicted in the guidelines provided.
After these initial steps, launching Etcher will no longer require command line intervention. You can easily start Etcher from your system’s Application Menu, streamlining the process for future use.
Flashing MicroSD Cards with Etcher on Linux
- Etcher now enables you to easily prepare microSD cards for your Raspberry Pi projects. Begin by launching Etcher and selecting the “Select image” button;
- This action will bring up a file selection dialog. Here, choose the operating system image file you wish to use for your microSD card and click “Open” to proceed;
- With the image file now chosen, it’s time to insert the microSD card or USB storage device you wish to flash. Etcher might automatically select it for you. However, if you have multiple devices connected and the correct one isn’t selected, click on “Change” as highlighted in the provided screenshot to select the appropriate device. From the displayed list, pick the device you intend to flash and click “Continue.”
It’s worth noting that Etcher supports flashing several USB devices or microSD cards simultaneously. Simply select all the devices you wish to flash from the list and click “Continue.”
Etcher also offers customizable settings to adjust the flashing process to your preference. Access these settings by clicking on the gear icon, as indicated in the screenshot. The settings menu in Etcher is straightforward, allowing you to toggle options by checking or unchecking boxes. The default settings typically suffice. However, deselecting “Validate write on success” can significantly reduce the time it takes to flash your devices. This validation process checks the accuracy of the data written to the device, which can be time-consuming and potentially wear on the device. The choice to disable this option depends on your confidence in the integrity of your microSD card or USB device.
- Once ready, click on “Flash!” to begin the process;
- Etcher will commence the flashing process on your selected microSD card or USB storage device;
- Upon completion, a confirmation window will appear, signifying that the process is complete. You can then close Etcher, safely remove your microSD card or USB device, and proceed to use it with your Raspberry Pi.
This guide outlines the steps for installing and utilizing Etcher on Linux, specifically focusing on Ubuntu/Debian distributions. Thank you for following along with this tutorial.