
Installing Brave Browser on a Linux System
Brave stands as a web browser renowned for its unwavering commitment to safeguarding user privacy and fortifying security measures. Its reputation has flourished due to its innate capabilities for countering intrusive ads and tracking mechanisms, while also offering an array of other privacy-centric utilities. Should you happen to be a devoted Linux enthusiast who is keen on fortifying your online privacy, the strategic choice of installing Brave onto your preferred Linux distribution serves as a substantial stride in the realm of privacy preservation. This article endeavors to guide you through the intricate process of installing Brave across a diverse spectrum of Linux distributions.
How to Install Brave on Linux, Specifically Ubuntu/Debian: A Comprehensive Guide
For users of Ubuntu and Debian-based distributions, such as Linux Mint, Elementary OS, and Debian itself, installing the Brave browser is a straightforward process using the APT package manager. In this comprehensive guide, we will walk you through the steps required to install Brave on your system. So, let’s get started!
Step 1: Open Your Terminal
To begin, open your terminal on Ubuntu or any Debian-based distribution. You can do this by pressing Ctrl + Alt + T or simply searching for “Terminal” in your application menu.
Step 2: Update Your Package List
Keeping your package list up-to-date is essential to ensure that you have the latest information about available packages. Run the following command in your terminal to achieve this:
sudo apt updateUpdating your package list will ensure that you’re installing the most recent version of Brave.
Step 3: Prepare for Brave Installation
Before we can install Brave, we need to add its repository and update our system’s package list. These commands will set up the necessary components:
sudo apt install apt-transport-https curl

sudo curl -fsSLo /usr/share/keyrings/brave-archive-keyring.gpg https://brave-browser-apt-release.s3.brave.com/brave-archive-keyring.gpg

echo "deb [signed-by=/usr/share/keyrings/brave-archive-keyring.gpg arch=amd64] https://brave-browser-apt-release.s3.brave.com/ stable main" | sudo tee /etc/apt/sources.list.d/brave.list
These commands establish a secure connection to Brave’s repository, ensuring a safe and reliable installation process.
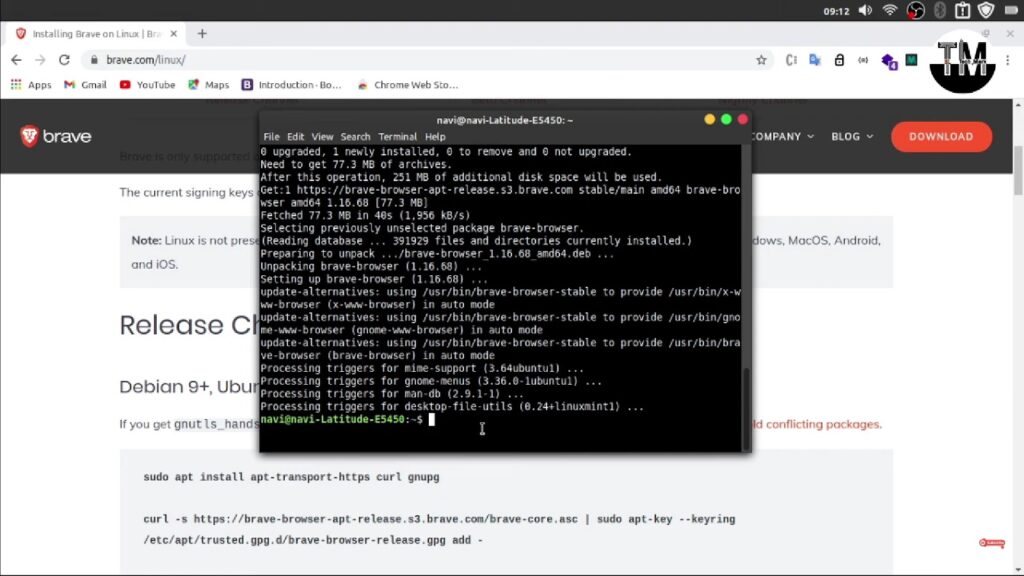
Step 4: Install Brave
Now that we have added Brave’s repository, we can proceed to install the browser. Execute the following commands:
sudo apt update

sudo apt install brave-browser
This will download and install Brave along with any necessary dependencies. Please be patient as the installation process may take a moment, depending on your internet connection speed.
Step 5: Launch Brave
Once the installation is complete, you’re ready to experience the speed, security, and privacy features that Brave has to offer. You can launch Brave in two ways:
Search for “Brave” in your application menu and click on the Brave browser icon.
Open your terminal and simply type:
brave-browserCongratulations! You’ve successfully installed Brave on your Ubuntu or Debian-based system. Now, enjoy faster and safer browsing with this privacy-focused web browser.
Also, unlock the power of command-line magic with our guide on how to install Curl on Linux. Elevate your Linux experience today!
How to Install Brave on Linux Fedora?
Brave Browser, with its privacy-focused features and lightning-fast performance, is an excellent choice for Fedora users. Below, we’ve provided detailed steps to install Brave on your Fedora system, ensuring a seamless browsing experience with enhanced security and ad-blocking capabilities.
Step 1: Open Your Terminal
Begin by opening your terminal. If you’re new to Fedora or terminal commands, don’t worry; we’ll guide you through the process step by step.
Step 2: Add the Brave Repository and Import the GPG Key
Adding the Brave repository allows you to access the latest updates and versions of the browser. Importing the GPG key ensures the authenticity and security of the software you’re about to install. Here’s how to do it:
Execute the following command to add the Brave repository to your system:
sudo dnf config-manager --add-repo https://brave-browser-rpm-release.s3.brave.com/x86_64/Next, import the GPG key by running this command:
sudo rpm --import https://brave-browser-rpm-release.s3.brave.com/brave-core.ascStep 3: Install Brave Using DNF Package Manager
Now that you’ve added the repository and imported the GPG key, it’s time to install Brave Browser. Fedora’s DNF package manager makes this process straightforward. Simply enter the following command:
sudo dnf install brave-browserThis command will automatically download and install Brave, along with its dependencies. Once the installation is complete, you’re ready to enjoy a secure and privacy-oriented browsing experience.
Additional Tips and Insights:
Updating Brave: To keep your Brave Browser up to date, periodically run the following commands in your terminal:
sudo dnf config-manager --set-enabled brave-browser

sudo dnf install brave-browser
Launching Brave: After installation, you can start using Brave Browser by either searching for it in your applications menu or launching it directly from the terminal with the command:
brave-browser- Extensions and Customization: Explore Brave’s vast library of extensions and customize your browsing experience to suit your needs. Whether you want enhanced privacy, ad-blocking, or productivity tools, Brave offers a wide range of options;
- Privacy Features: Take advantage of Brave’s built-in privacy features, such as shields for blocking trackers, HTTPS Everywhere, and fingerprinting protection. These features help protect your data and enhance your online security.
How to Install Brave on Arch Linux?
If you’re an Arch Linux enthusiast looking to enhance your browsing experience with the privacy-focused Brave browser, you’re in luck! You can easily install Brave on Arch Linux through the Arch User Repository (AUR). We’ll guide you through two methods: using the AUR helper “yay” and installing it manually.
Installing Brave with yay:
Using yay, an AUR helper, simplifies the process of installing Brave. Follow these steps:
- Open your Terminal: To start, launch your terminal application. You can typically find this in your application menu or by using a keyboard shortcut like Ctrl + Alt + T;
- Install yay: If you haven’t already installed yay, execute the following command to get it from the official Arch repositories:
sudo pacman -S yayInstall Brave: Once yay is installed, you can proceed to install Brave by executing:
yay -S brave-binLaunch Brave: After the installation is complete, you can easily launch Brave by either running brave in your terminal or searching for it in your application menu.
Manually installing Brave from AUR:
For those who prefer a more hands-on approach, you can manually install Brave from the AUR. Here’s how:
Clone the Brave AUR package repository: Open your terminal and clone the Brave AUR package repository with the following command:
git clone https://aur.archlinux.org/brave-bin.gitNavigate to the cloned directory: Change your working directory to the newly cloned Brave package repository:
cd brave-binBuild and install Brave: Use the makepkg command to build and install Brave:
makepkg -siLaunch Brave: Once the installation process is complete, you can conveniently launch Brave by searching for it in your applications menu or by executing brave in your terminal.
Uninstalling Brave Browser on Ubuntu 22.04
Removing software from your Ubuntu system can be a straightforward process when you have the right commands and guidance. If you find yourself wanting to bid adieu to the Brave browser on your Ubuntu 22.04 system, here’s a comprehensive guide to assist you. Follow these steps to ensure a smooth uninstallation process:
Step 1: Open the Terminal
Press Ctrl + Alt + T to open the Terminal.
Step 2: Run the Uninstall Command
In the Terminal, type the following command:
sudo apt remove brave-browser
Press Enter to execute the command.
You will be prompted to confirm the uninstallation; type ‘y’ and press Enter to proceed.
Step 3: Wait for the Process to Complete
The system will now remove Brave browser and its associated files. Be patient, as this may take a moment depending on your system’s performance.
Additional Tips:
If you want to remove configuration files as well, you can use the following command instead:
sudo apt purge brave-browser
How to Install Brave on Linux: Troubleshooting Errors During Installation
During the installation process, you might encounter certain errors, especially while importing the GPG key. If you face such issues, here’s how to resolve them:
Error: GPG Key Import Failure
If you encounter an error while importing the GPG key, follow these steps to resolve it:
Open the Terminal and type:
sudo nano /etc/resolv.confAdd the following line to the file, which sets the DNS resolver to Google’s DNS (8.8.8.8):
nameserver 8.8.8.8Press Ctrl + O, then Enter to save the changes, and Ctrl + X to exit the text editor.
Retry the installation steps for Brave browser mentioned earlier.
By ensuring that your DNS resolver is correctly configured, you should be able to import the GPG key without encountering any errors during the installation process.